 Heyyy . . . I thought it was time for an updated yogurt recipe. The old one is way back in the archives, and I have made a few simplifying changes to my method.
As I've only ever made this in my crockpot I cannot guarantee outcome in any other vessel. :) I assume that a stainless steel pot would heat and cool quicker, and might not retain heat as well during the incubation. Also, your crockpot might take longer to heat the milk in the first step. It's a matter of trial and error, or at least it was for me. I've had a few batches flop. That's how we progress, right?
I think this is a worthwhile thing to learn . . . that is, if your family likes yogurt. You will save a lot of money and besides, it's fun. After a while you will find this process easy, I promise. Apart from setting timers and turning things on and off, it requires zero "work."
(Oh Rebekah, some friends say, normal people don't make their own yogurt.
Well of course, I reply, but I am not normal people.)
If your yogurt does not thicken the first time, no worries. You can still put it in smoothies and pancakes. I am happy to help troubleshoot. So have at it.
---
Plain Yogurt
1 gallon whole milk
1/2 cup plain yogurt with live and active cultures*
1) Pour milk into large stainless steel pot or crockpot. Heat to 185 degrees, just bubbling around the edges. This takes 2.5 hours in my crockpot set on high. If using a large pot on the stove, stir often to prevent burning; this is why I do it in the crockpot, as I would be sure to burn it on the stove. Do use a trustworthy thermometer to check your temperature. This step ensures that the milk is clean so you don't accidentally incubate any "bad" bacteria along with your yogurt.
2) Once milk has reached 185 degrees** turn off the heat and let milk cool to between 100 and 115 degrees. (Above 115 the yogurt cultures die, but below 100 they clam up and go to sleep again.) For this step I remove the crockpot insert, crack the lid, and set it on the counter; cooling takes about 2.5 more hours. Again, depend on a trustworthy thermometer here. I have been making this for so long that I now can tell the right temperature by touch, but don't risk it until you are sure.
3) Once milk has cooled, skim off and discard the skin that has formed on top. Preheat an empty oven to 350. Dump your 1/2 cup plain yogurt into the warmed milk and stir gently.
4) After oven has preheated, turn it off. Put lid back on pot of milk, then wrap the whole thing up in several old towels and place in warmed oven. To help retain the heat, I turn on the oven light and stick in several jars of very hot water to keep the yogurt company.** Now comes incubation, that your yogurt bacteria may be fruitful and multiply. (Jared calls this "putting the yogurts to bed.")
5) Incubate for 8-12 hours depending on how tangy you like it. I personally don't care for it past 9 hours. After incubation period is over, unwrap pot of yogurt. Skim off any whey-- clear or slightly yellow liquid-- that has separated on top. Whisk yogurt to insure a smooth texture; it will look thinner than desired at this point, but chilling sets it up again. Ladle into clean glass jars and refrigerate. Remember to keep back 1/2 cup for next time!
Notes:
When I'm making yogurt I start at 4:30 PM. Heating and cooling is done by 10:00 at the latest, at which time I put the milk with its starter into the warmed oven. At 6:00 AM, approximately eight hours later, it's ready. You can also start early in the morning, if you'll be around to mess with it during the day and won't need the oven that afternoon.
For jars, I recommend pasta sauce jars as small a "shoulder" as possible; the yogurt is easier to pour in and spoon out that way. Ideally, you want a wide mouth and straight sides. So Classico or Del Grasso, not so good; Gia Russa, perfect.
I always strain half of mine to make Greek yogurt, or as I call it in my nerdy way-- by which I mean it's written on the masking-tape label of the jar-- yaourti. That's Greek for "yogurt" and though I have no idea how to pronounce it the word makes me feel heaps more authentic :) Anyhoodle, if you would like to do the same, simply line a sieve or colander with thick paper towels and pour in the yogurt; set over a bowl and refrigerate for a few hours or until it is as thick as you want. Pictures here.
And yes, I find it worthwhile to make a gallon of yogurt at a time, even just for the two of us, since the stuff lasts a very long time in the refrigerator. We use it in a lot of different things. Besides, I "lose" a quart in whey when making Greek yogurt (yet it is still astronomically cheaper than anything you can find at the store).
---
*I would recommend organic whole milk yogurt, such as Stonyfield Farm. That contains a variety of good strong cultures. Pricey, but afterwards you can simply use yogurt from the last homemade batch. Homemade yogurt is so much cheaper than storebought that it's completely worthwhile to get the cultures off to a good start.
**Another way to incubate is to wrap the covered pot in towels and put it on a heating pad, set to the very lowest setting. I haven't tried that but have heard that it works. Or you can do what my dad does: incubate it in a cooler, surrounded with towels and with the heating pad on top.
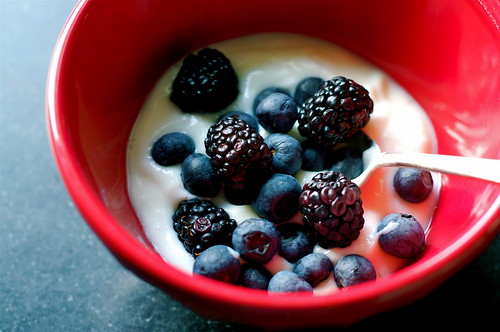
{image credit: the bakingbird}
I suggest that you do a Vital Life on this!! :) It's so fascinating. I can do lots of other things from scratch but this one intimidates me. I've read this post 2 times and I really think I could do it. It's super easy, it's just time. And purchasing a thermometer.
ReplyDeleteI agree-- even if you make your own everything, this one's hard to wrap your mind around-- I think the only reason I had the courage to try was because my dad does it so I'd seen it work before! :)
ReplyDeleteThe temperatures and time are the critical things. The method is secondary... I remember a doctor once saying, "In a living thing the desire to live is strong" Same goes for yogurt. Hey even dad can do it!
ReplyDeleteBe brave!
daddus
The temperatures and time are the critical things. The method is secondary... I remember a doctor once saying, "In a living thing the desire to live is strong" Same goes for yogurt. Hey even dad can do it!
ReplyDeleteBe brave!
daddus
Last time I made it I misjudged my times and 3:00 a.m. would have been 8 or 9 hours in the cooler/heating pad method. I slept til 7:00 and remembered to jar the yogurt after 15 hours. BEST yogurt I've ever made.
ReplyDelete